Dave's T-Top install page!!!!!!!!!!!!!!!
I have wanted t-tops in my Formula since before I bought it. My original requirements for the car was t-tops, leather and the manual tranny. Since in 1994 GM was playing games with their customers and limiting the production of this combo I settled for the minimum requirement of mine which was the manual trans. Later I bought the leather seats out of a totaled '95 TA as mentioned elsewhere in this site and NOW I HAVE T-TOPS!!!
I bought all of the parts from www.speedautomotive.com.
They are a GREAT salvage yard for fourth gen parts. They cost me $500 total.
That didn't include the headliner since they cannot ship that. I ordered the
headliner from a local dealer for $90 delivered. I didn't have a donor car to work
with so I relied on some of the pix that are on this site: Curt's T-Top site
Curt's site. He is one of 3 guys I heard of recently doing this. If it wasn't
for them I may never have had t-tops in the car.
Now some say "why didn't you just sell the car and buy one that had them".
First, my car is paid off and I don't need another car payment. On top of that I
could never sell my car and recoup what I have put into it. Finally, I am in grad
school now (no I am not too old :-) !!!) and couldn't pay for it and a new sports car even
if I wanted to try.
I have been tossing around the idea of doing this install for local people who don't want to attempt it. Contact me if you are interested. I would have to figure out a price that is fair though.
Stock and prep pictures:
driver's front inside stock; - note the
partially covered t-top mount bracket hole (the other is covered by the metal)
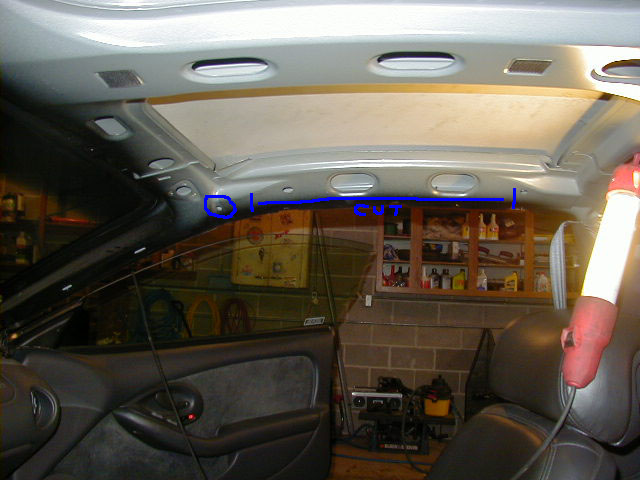
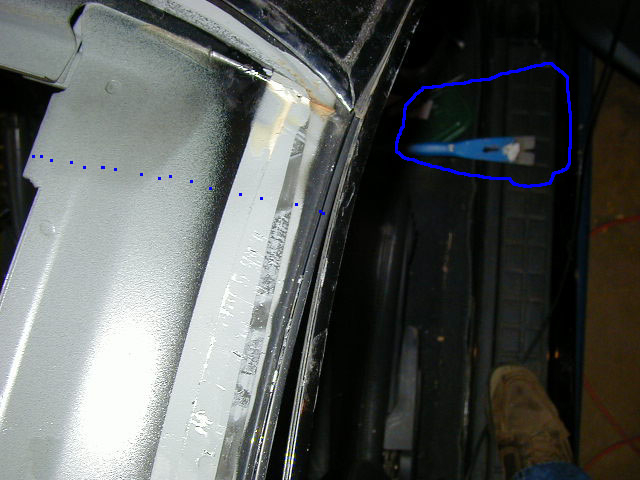
driver's outside removing weather-strip; -
weather stripping just runs in these channels they slip into.
driver's rear inside stock;
pass inside stock;
pass rear stock;
pass weather-stripping removed
Cutting and channel prep:
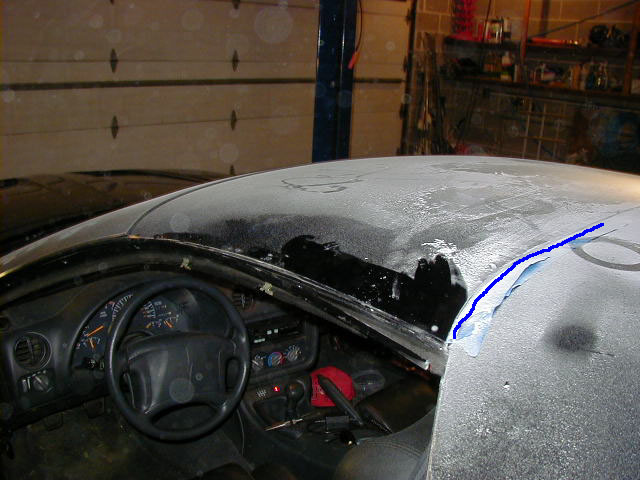
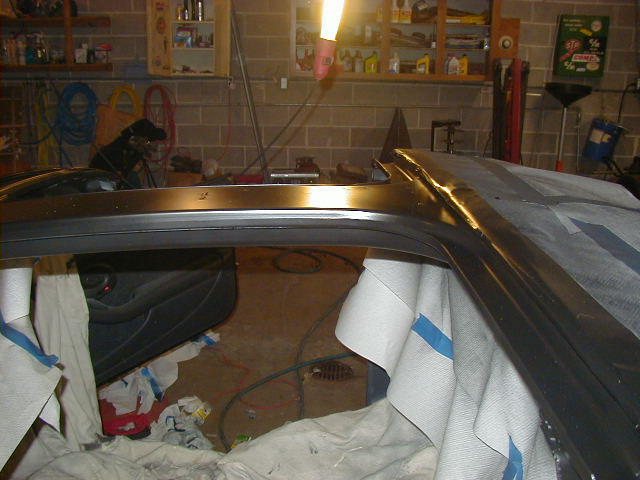
Driver's Front #1; - first cut of the roof - I used a
dremel with the reinforced cutoff wheels for most of the tight space cutting and the
roof. To cut the main side supports out I used a sawzall.
Driver's Front #2; - Roof removed! What a
sight.........
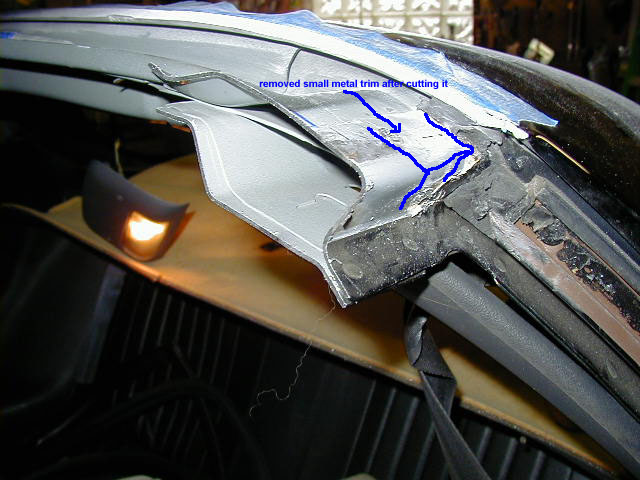
Driver's Front #3; - another angle of the roof removed
see the highlighted pre-existing weather stripping channels?
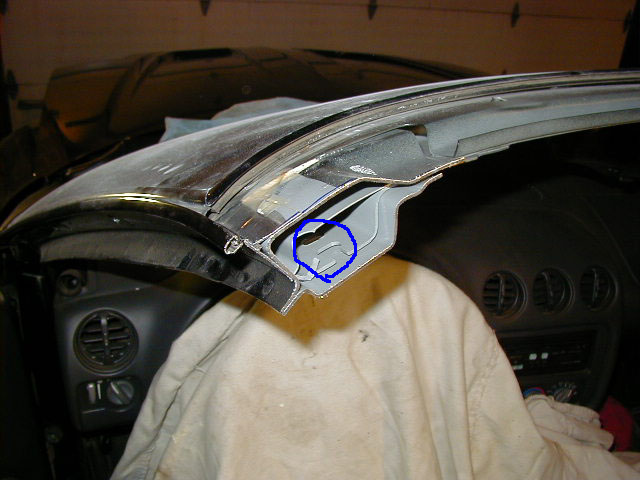
Driver's Front #4; - first cut of the side
support. Note the t-top bracket mounting holes
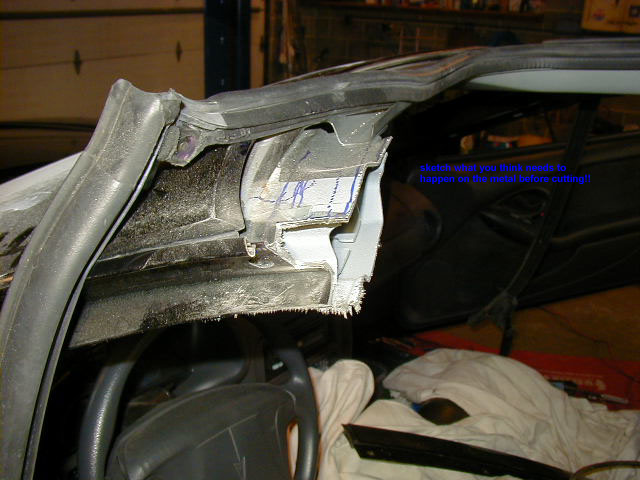
Driver's Front #5; - Here is a close up of
#4
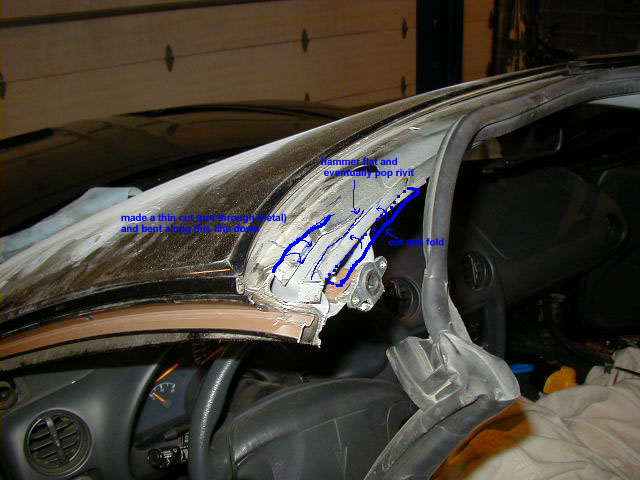
Driver's Front #6; - driver's front fabrication #1
Driver's Front #7; - driver's front fabrication #2
Driver's Front #8;- driver's front fabrication #3
Driver's Front #9;- driver's front fabrication
#3, no scribble on it
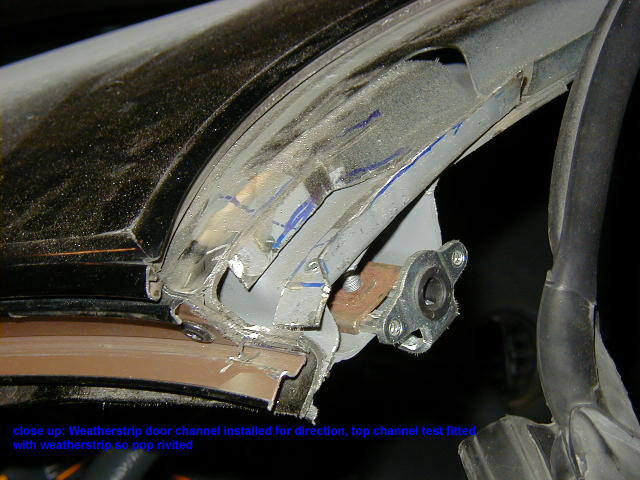
Driver's Front #10;- driver's front fabrication #4
Driver's Rear #1; - before the first cut
Driver's Rear #2; - First cut and close
up. Note bracket mount holes
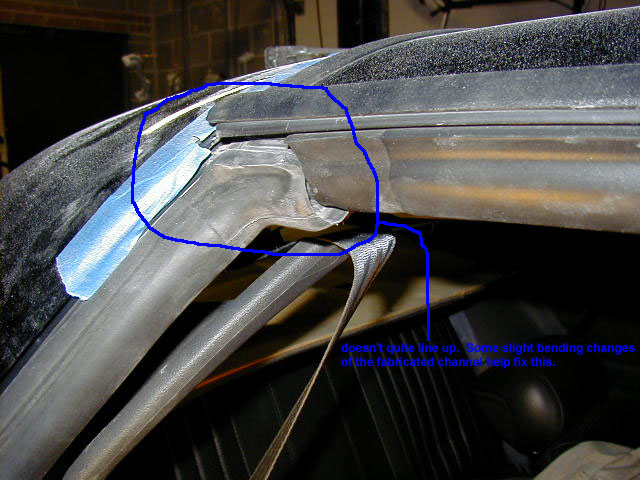
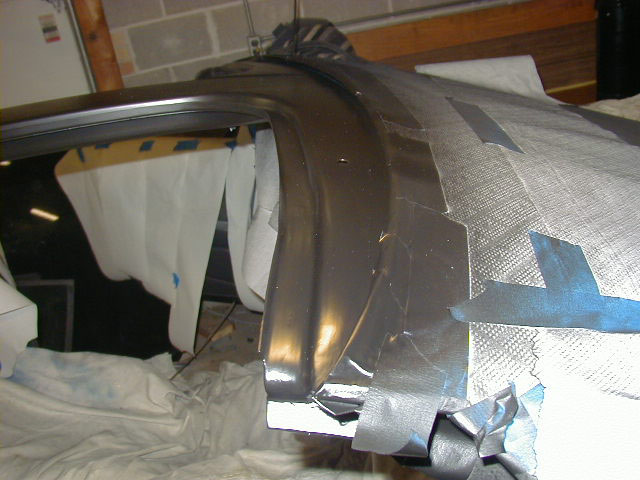
Driver's Rear #3; - cutting and fabrication #1
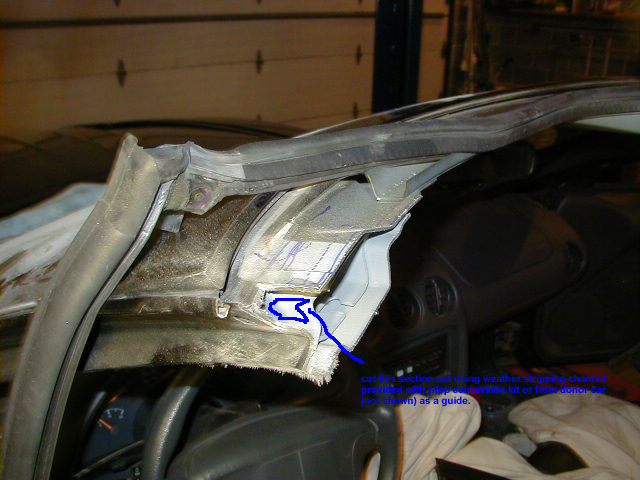
Driver's Rear #4; - cutting and fabrication #2. Always
use weather strip as a guide for areas that need work and channel length.
Driver's Rear #5; - cutting and fabrication #3.
Driver's Rear #6; - cutting and fabrication #4.
Driver's Rear #7; - cutting and fabrication #5.
Driver's Rear #8; - cutting and fabrication #6.
Passenger Side #1; - test of the t-top resting
somewhat in place. To make me feel better.
Passenger Side #2; - Before cutting away on pass side
Passenger Side Front #3; - close up of
front. Make sure to leave enough material to build the channel....notice the
crowbar. that fiberglass roof needed a little persuasion!
Passenger Side Rear #1; -
Passenger Side Rear #2; -Different angle of
pass side rear #1
Passenger Side Rear #3; -close up of pass side
rear #1
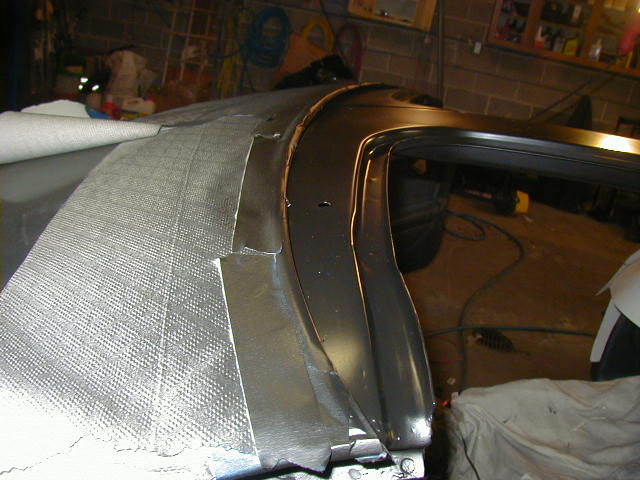
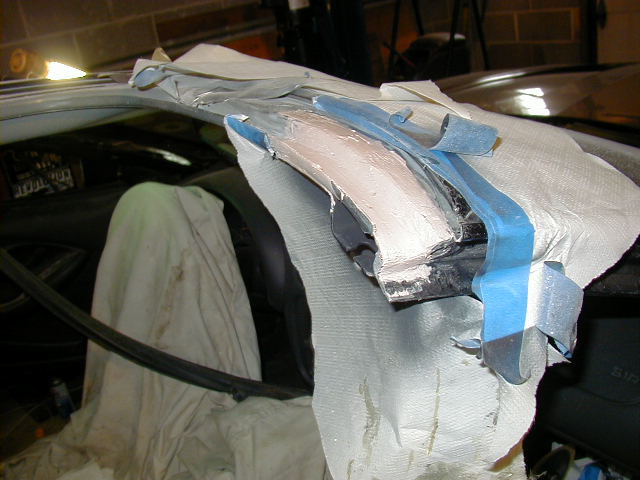
Passenger Side Rear #4; - channel lip building
Passenger Side Rear #5; -
Passenger Side Rear #6; - busy with
recommendations
Passenger Side t-top test fit #1; -
Passenger Side t-top test fit #2; -
Passenger Side t-top test fit #3; -
Passenger Side t-top test fit #4; -
Finishing it up:
Drivers Side Front #1; - sanded down all the
metal.
Drivers Side Front #2; - Another sanded pix -
followed by covering with fiberglass and then a thin layer of body filler for a smooth
surface.
Drivers Side Front #3; - painted #1
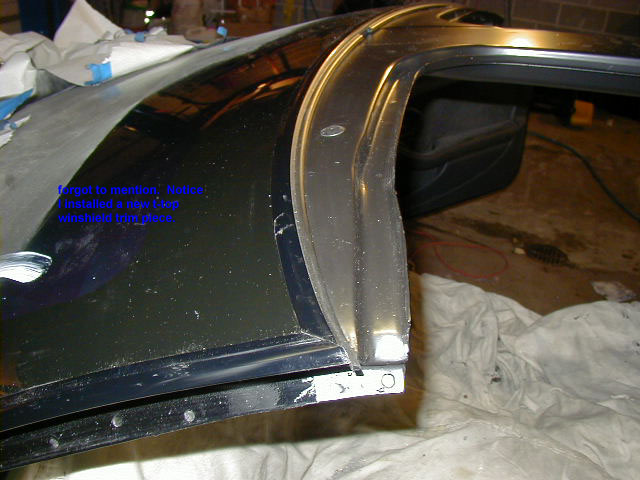
Drivers Side Front #4; - painted #2 - installed
t-top window trim as well.
Drivers Side Front #5; - painted #3
Driver's Side rear#1; - Fiberglass example -
Slightly blurry. Sorry
Driver's Side rear#2; - Fiberglass example
Misc: - painted roof
Passenger Side Front#1; - Thought I took pictures
of the fiberglass but cannot find them. Here are some starting with the filler
layer.
Passenger Side Front#2; -
Passenger Side Front#3; -
Passenger Side Front#4; -
Passenger Side Rear#1; - Again missing some
pictures. only primed and on.
Passenger Side Rear#2; -
Passenger Side Rear#3; -
Passenger Side Rear#4; -
All Done!!!!!!!!!!!!!!!!:
Done#1: - Driver's side outside
Done#2: -
Done#3: -
Done#4: - Passenger Side
Done#5: -
Done#6: -
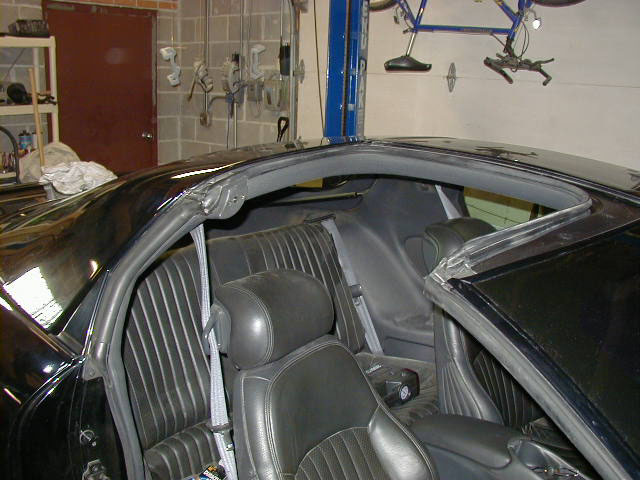
Done#7: - Inside look around!!!
Done#8: -
Done#9: -
| T-Top Install Page!!!!! | Moser 12 Bolt |
| 2001/2 396 rebuild page | 2001/2 Canfield Race Port |